 Those scorching Florida summer days are winding to a close and the hurricane season is coming to an end. Starting to dream about getting the boat out of storage and start enjoying that magnificent Sunshine Coast water? Take a moment now to check up on your boat, especially the bottom, before launching her for the season. Here are eight must-check items to get your boat ready to hit the water. 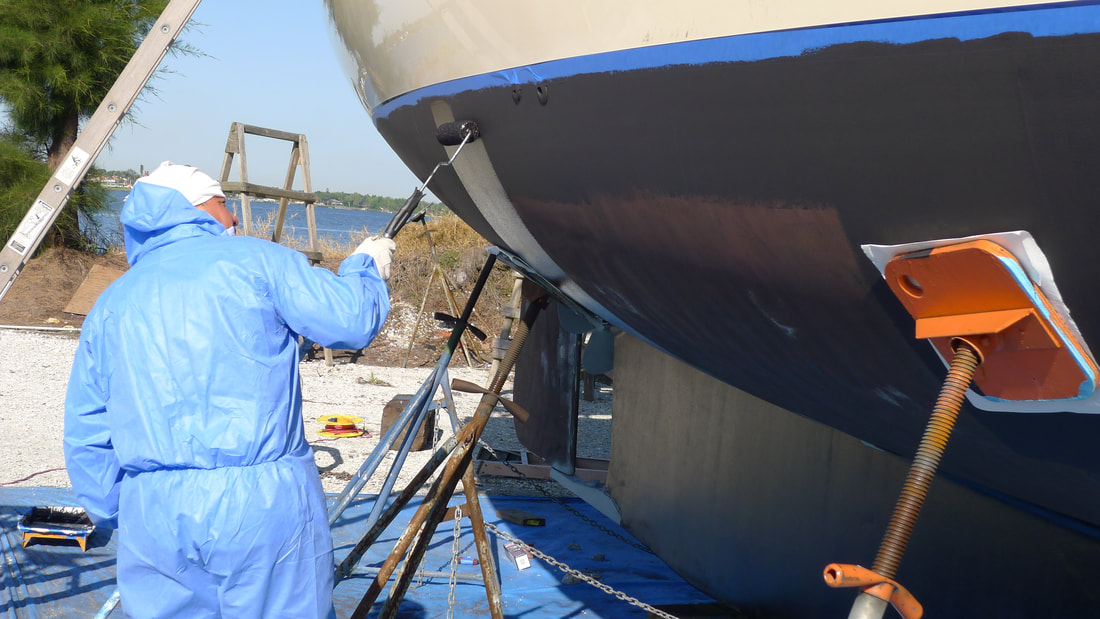 1. Bottom paintThe best time to check up on your bottom paint is while the boat's out of the water. Inspect the bottom for areas where the paint is wearing thin or where it's built up too much and is starting to peel and chip. If it's time for new bottom paint, taking care of it now will keep the growth off your boat and keep those visits from the diver short and sweet. 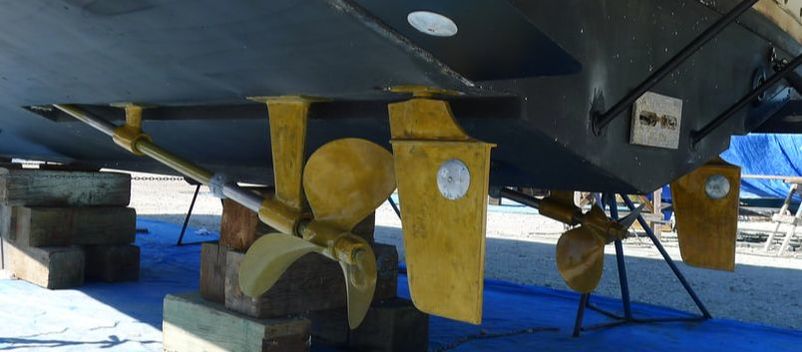 2. Running gear & metalworkYou're also in a position to take a good hard look at the running gear and metalwork below the waterline. Make sure there isn't any electrolysis or damage lingering from last season. If it's time, you can always clean it and give it a coat of paint, Prop One or Prop Speed to keep your yacht running smoothly. 3. Check the cutlass bearingThe cutlass bearing is another piece of equipment that you don't want to have a problem with once the boat's in the water. A worn bearing (or shaft that has worn out of the cutlass bearing's tolerance) can cause vibration issues while operating which can do further damage to your boat's power train. Ensuring that your cutlass bearing is in good condition will lead to a nice, smooth drive out of the boatyard. 4. Change your zincsThere's no point in waiting for the diver to visit to change your zincs at the beginning of the season—start out with a fresh set before the boat goes into the water. 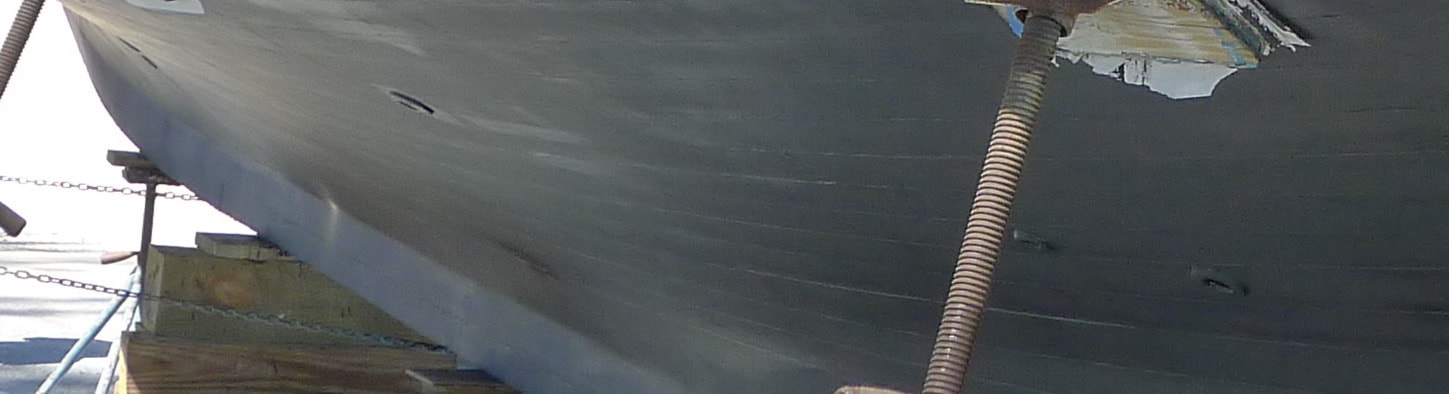 5. Look at those thru-hullsDid you know that almost one-fifth of sinkings underway and about half of sinkings at the dock are due to failed thru-hulls? Checking your thru-hulls while the boat's out of the water, testing them and lubricating them if necessary is a good first step toward keeping your boat afloat all season. 6. Check the bilge pumpsAn absolute must before putting the boat in the water: make sure the bilge pumps are working (just in case any leaks sprang up over the summer). 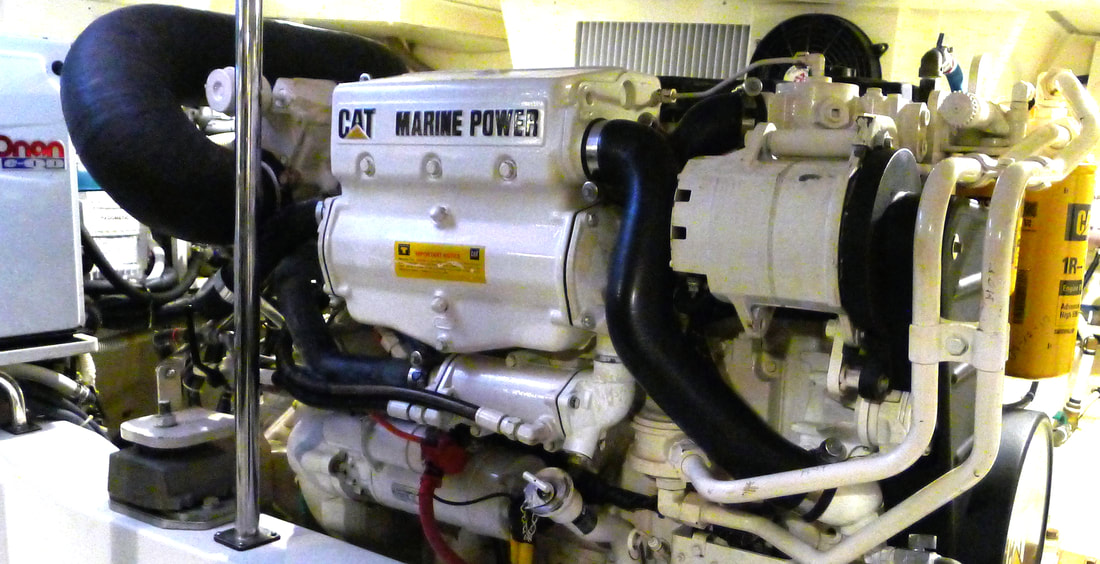 7. Give your engine some loveIt's a good idea to take a look around the engine room and make sure everything is in order. This is also a great time to do an annual engine service, including an oil change, replacement of filters, fuel filters, transmission fluid and engine zincs, and a belt check. A clean bill of health for your engine will give you peace of mind all season. 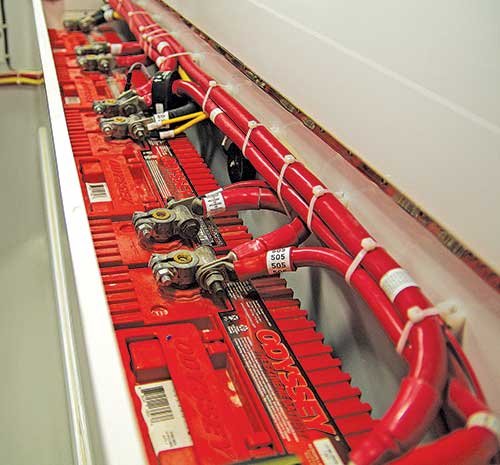 8. Test the batteriesThe number one problem boat owners experience at the beginning of the season is bad batteries. Make sure they've been tested, charged, and topped off with water (if necessary) before you pull off the dock. And get ready to enjoy the weather!We hope you have a great 2018-2019 season and look forward to seeing you and your boat again next summer. Bon voyage! 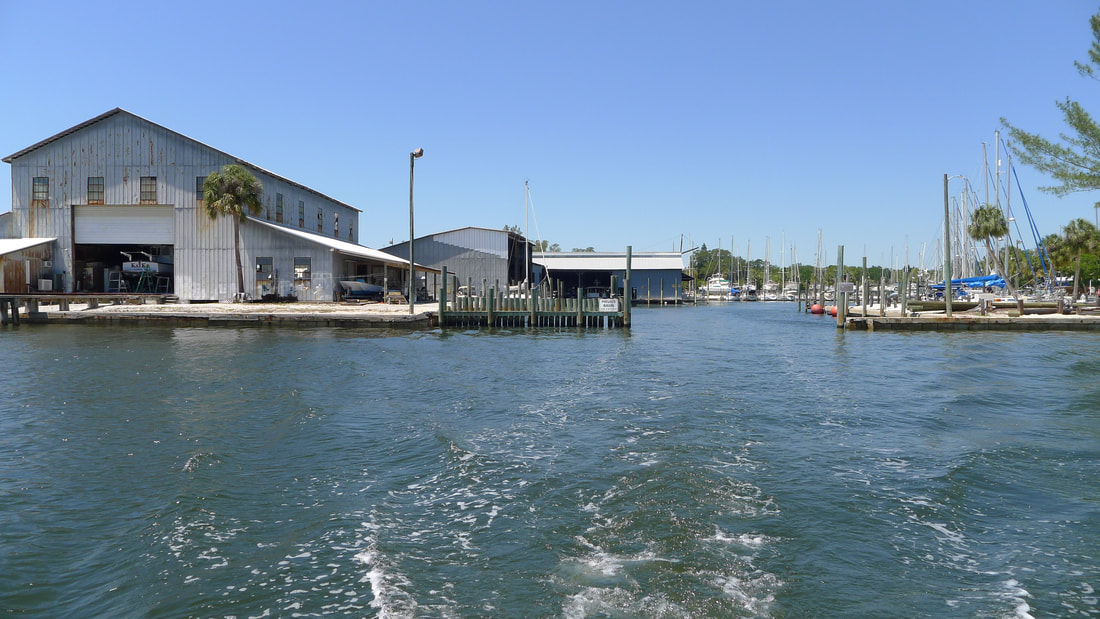  This sailboat's electronics system has been re-designed after a lightning strike to integrate traditional gauges, autopilot and chart plotter. Not so long ago, marine electronics operated on a piece-by-piece basis. You might have had a depth sensor, wind indicator, AIS monitor, sonar or radar screen and chartplotter, each with its own screen and its own set of controls. And trying to connect these things together—good luck! Each manufacturer had its own proprietary connectors and code, so trying to get a Raymarine depth sounder to talk to a Garmin chartplotter was about as promising as getting a sailor and a power boater to see eye to eye. A new way of connecting Thankfully, that’s changing. And one of the biggest reasons that it’s changing isn’t visible at the nav station or on the console. It’s called a NMEA network (pronounced “NEE-mah”), and it’s changed the way that marine electronics communicate. It exists because of the National Marine Electronics Association (NMEA), which was formed in the late 50s to foster innovation in marine electronics. The heart of it is a series of standards that are used to coordinate the messages sent by the different electronic components, with a standard set of cabling and connection solutions. 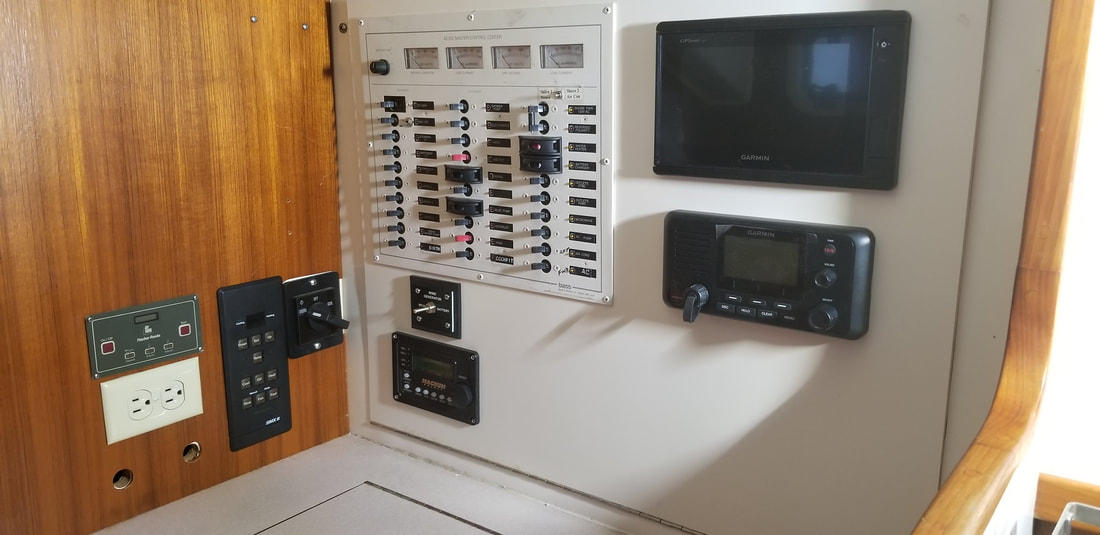 The nav station features a connected display and radio to keep tabs on the boat's position from the inside. Today, all NMEA certified electronics components are programmed to be able to send data through the NMEA network, and receive data from the network, so that any component—no matter what the manufacturer—can be integrated into a unified electronics system. This is a real boon for boat owners, and it’s made possible the exciting new touch-screen navigation systems that allow boat owners to monitor all of their boat’s data on a single screen. 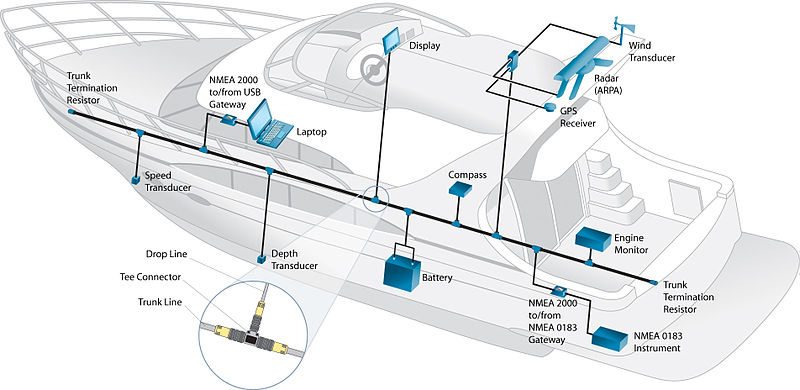 This diagram gives an overview of how the network functions. The NMEA networkLet’s have a look at how this works. There are multiple instruments on a boat that gather data: these might include a depth sounder, sonar, radar, wind instrument, AIS, GPS, autopilot, as well as engine indicators. All of these require power and send data. The NMEA network wiring supplies both: a single cable system forms the backbone of the system, delivering power and transmitting data from all of the instruments along the backbone cable, so any instrument that's plugged into that cable has access to all of the data connected to it. So once it's plugged into the system, a multifunction chart plotter can read and display all of the data, and translate your commands from the chart plotter to the autopilot to seamlessly navigate your vessel. 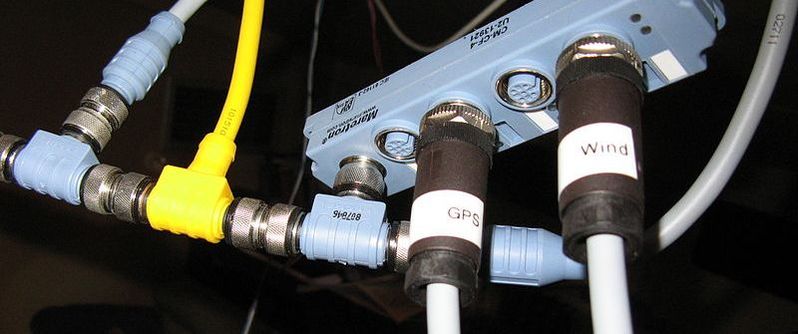 A variety of NMEA network connections links the individual components in the system. This is a really powerful tool that can allow you to take your boat’s electronics system up to the next level—often without requiring the replacement of all of the electronic components in the boat. It’s also a little tricky to work with, which is why NMEA has created a certification for electronics technicians who are familiar with this technology. At Snead Island, our technicians are all NMEA certified, so you can rest assured that we can properly address any wiring issues that come up during an installation.
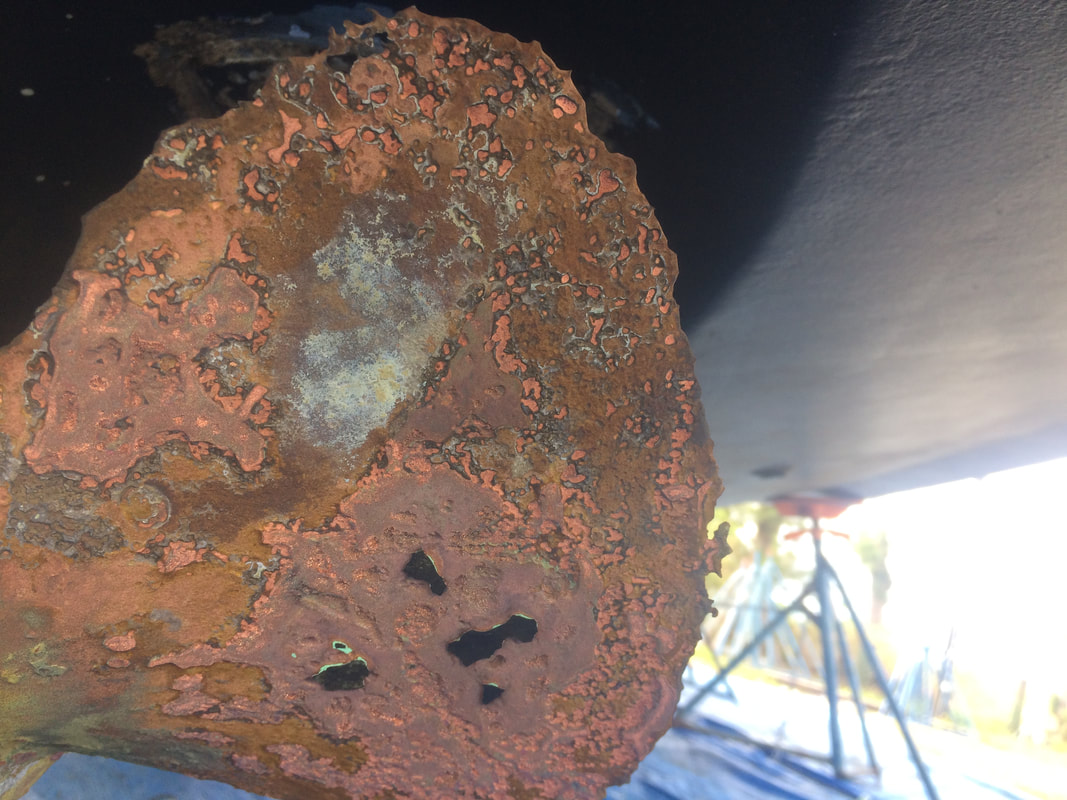
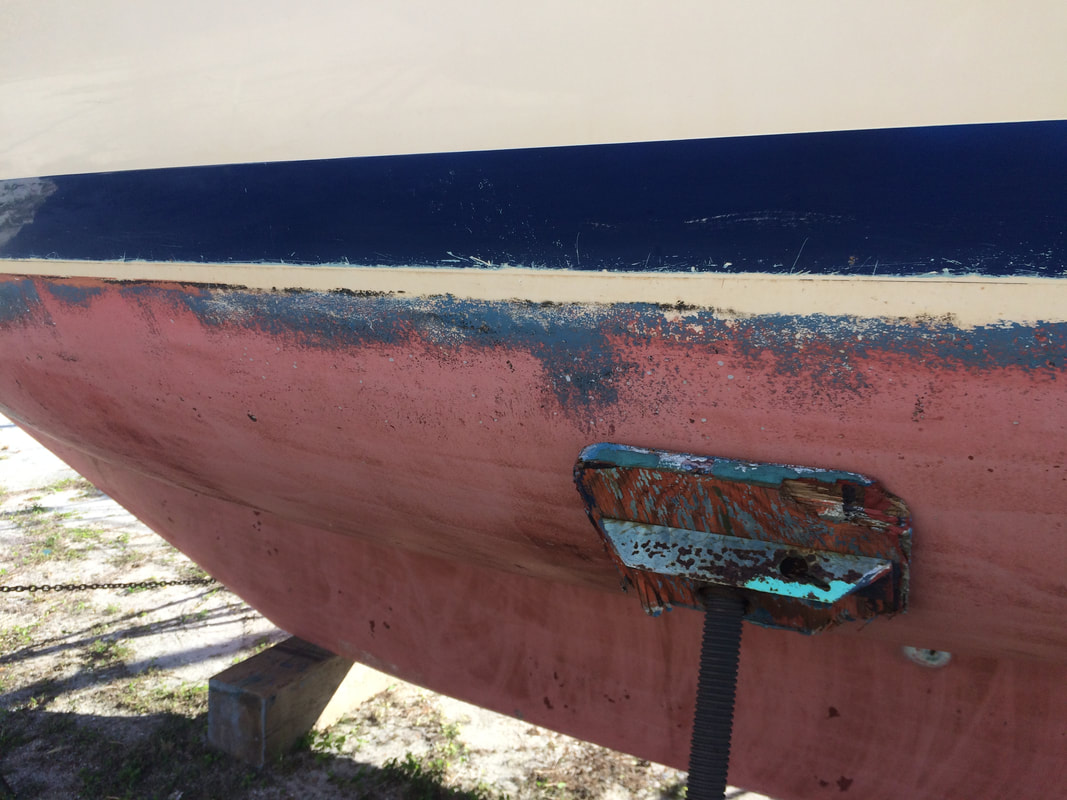
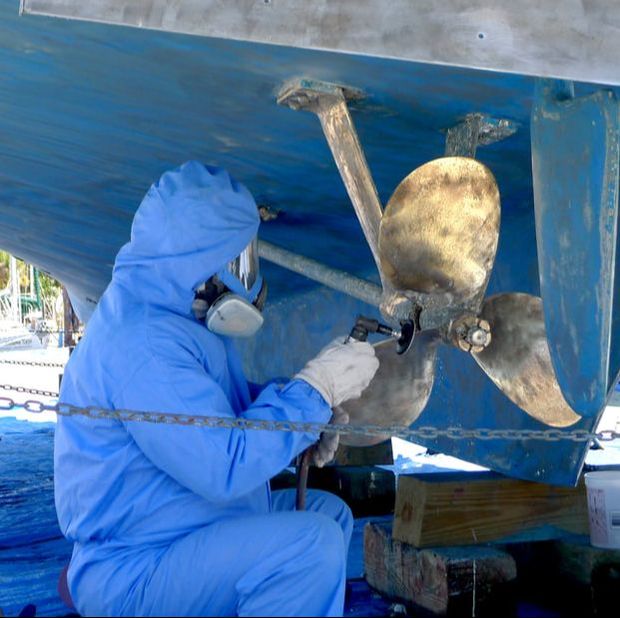
The really exciting thing about the NMEA network is that it makes things possible that wouldn’t have been a generation ago. New navigation equipment doesn’t necessarily have to wait for a re-wiring of the whole boat and new components can be added seamlessly into an older system, which means that the electronics upgrade you’ve been looking for might not be as far out of reach as you think. 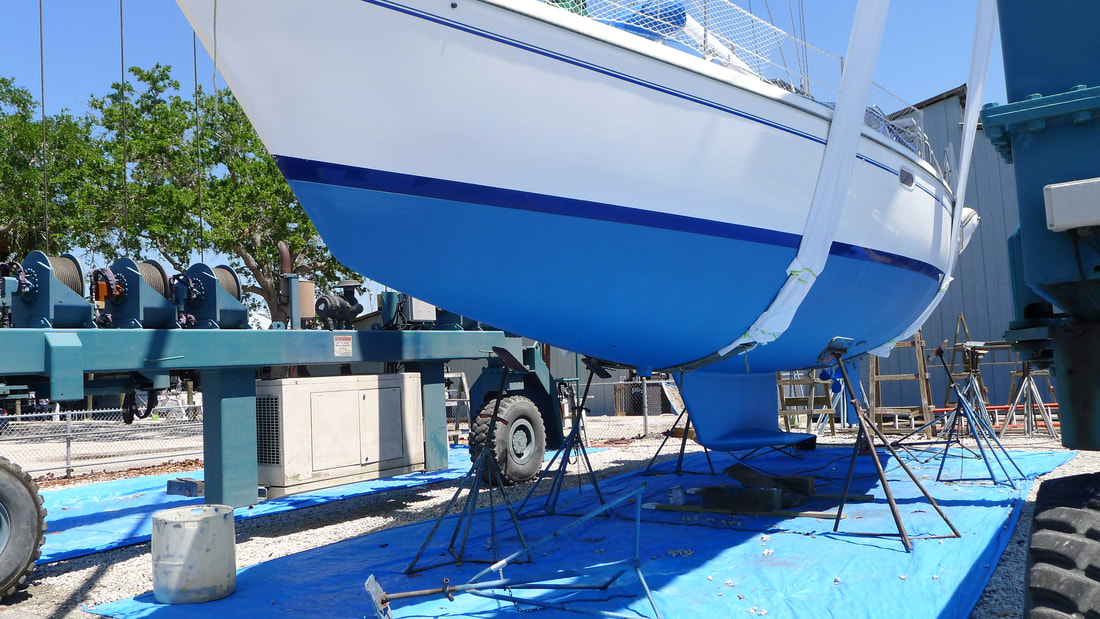 Painting the bottom of your yacht isn't as sexy as installing a brand new electronic navigation systems with all sorts of great bells and whistles—but it is an important part of protecting your hull and ensuring a long service life for your vessel. So I'd like to take moment to talk about what we look for when evaluating a bottom, our process for preparing and then painting the bottom, and about the different kinds of bottom paint available for your yacht. Evaluating the bottomFirst, let's talk about what we see when the boat has been lifted out of the water and cleaned with a thorough power washing. We check for lots of things that we're able to see right away, including: unusual wear or damage and the condition of the cutlass bearings, zincs, propellers, thrusters, rudders and trim tabs. We then consider the following questions: Is there obvious electrolysis? Electrolysis is the result of stray electrical current in the water. The zincs are there to protect your boat against electrolysis, but if there's enough current, sometimes the zincs can't keep up with it.
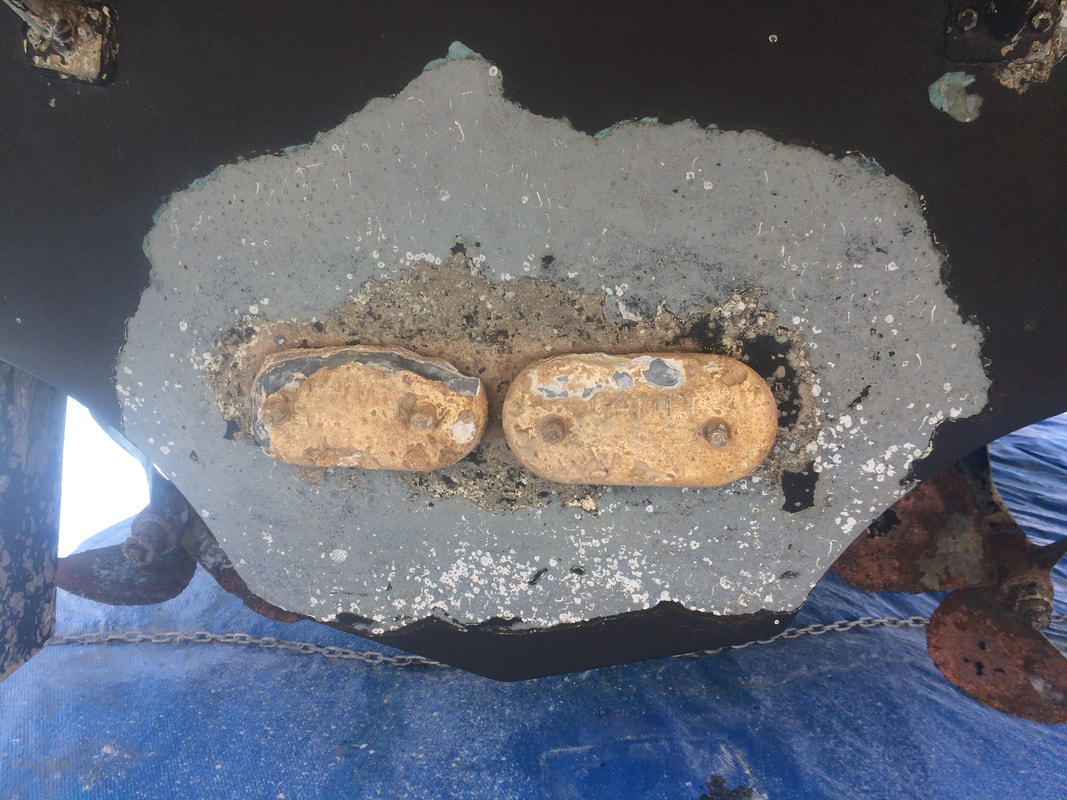
Electrolysis can range from minor to severe - these images are taken of a severe case. On the transom around the zincs, all of the bottom paint and even the gelcoat has decomposed leaving bare fiberglass visible. The propellor is so severely pitted that there are pinholes on the edges. 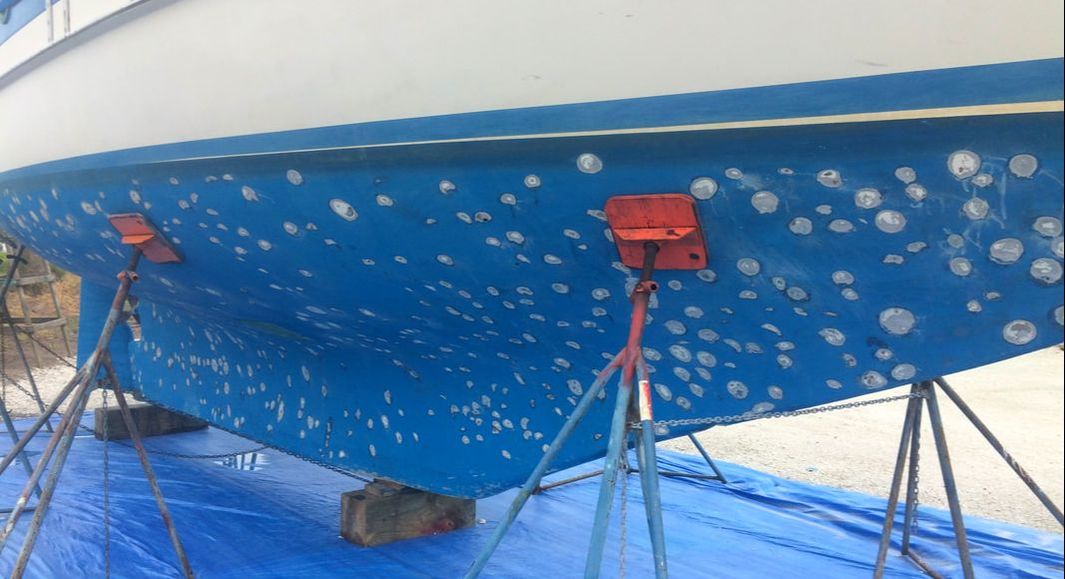 This boat's bottom is in the process of being treated for blisters. Here, the bad areas have been ground out and are drying before being patched, sealed and finished. Are there blisters? When your boat is hauled for a survey, and the surveyor starts banging away on the bottom with a hammer, one of the things they are looking for is delamination. Blisters are a kind of delamination, area in the hull where water has penetrated beneath the gelcoat and gotten into the fiberglass. When the surveyor taps a blister with a hammer, a blister makes a different sound than the rest of the hull. Most blisters show up on the bottom as pronounced bumps of various size. Not all boats suffer from hull blisters, but if yours does, it's a good idea to take care of them while the boat is out of the water for bottom paint.
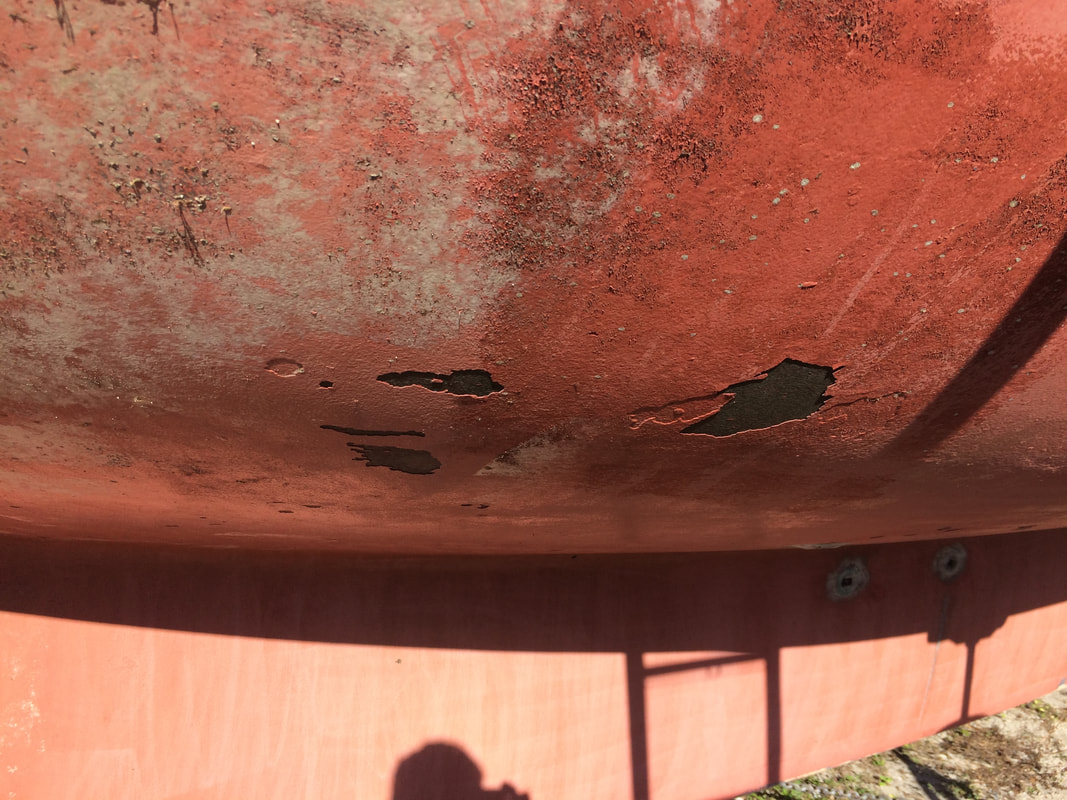
How much bottom paint is already on the boat? When we sand the bottom, how much sanding is to be done depends in part on how much paint is on the boat. If there is too much paint, it's important to sand off the excess. If the paint is too thick and starting to chip and flake, the new paint will fall away as the old paint underneath it fails. We sand the bottom so there is an optimal thickness of paint remaining, allowing for a strong bond between the new paint and the hull. Too little paint can also be a problem. If the gelcoat is visible through the paint, or if there is too little paint for us to sand without scratching the gelcoat, we'll need to apply a barrier coat of epoxy to protect the gelcoat and the fiberglass. Is the bottom paint falling off the bottom? Needless to say, if the bottom paint is falling off the bottom we need to remove all of the loose paint—and all of the paint in danger of becoming loose—before adding new paint. There's no point in spending money on new paint if it's just going to flake off when the old paint gives way. Planning your bottom jobOnce we've identified any potential problems with the bottom paint that need to be addressed, we'll discuss a plan for sanding, preparing, and applying bottom paint. It's important to realize that this plan is customized to your boat, its condition, and where it will be going: there is not one bottom paint or one standard treatment that works for all bottoms. Choosing your bottom paintThe first question we ask is what kind of paint the bottom has on it. There are two main categories: hard and ablative (semi-ablative paint combines the qualities of the two). Here's a quick comparison between the two:
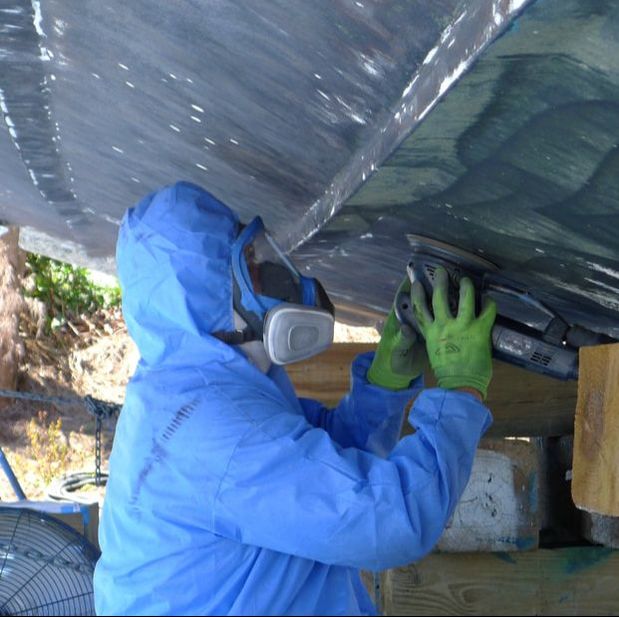
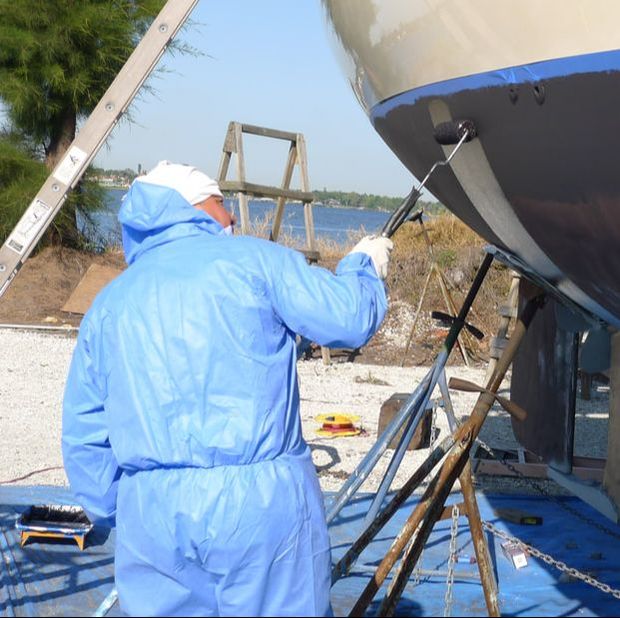
We can usually tell whether your old bottom paint is hard or ablative, and plan accordingly. Ablative paint can go over hard paint, but hard paint can't go over ablative paint. It's helpful to know what kind of bottom paint is on the boat so that we can prepare the bottom according to the manufacturer's recommendations. Another factor that we consider when recommending a bottom paint is where the boat will be moored. Different paints perform better in salt, brackish or fresh water, and water temperature affects how much growth you'll be combating. We base bottom paint recommendations on our knowledge of the area and the challenges posed by different locations. Sanding, epoxy barrier coats, and blister repairThe biggest variable in the cost of a bottom job is the preparation time. Depending on what kind of paint you choose and the condition of your bottom, we will make a plan for sanding and preparing your bottom. This typically falls into one of three categories: Light sanding If your bottom paint is in good condition, the paint isn't too thick and we're applying the same or similar paint over your old paint, a light sand may be all you need to prepare the bottom. Hard sanding If you have a thick buildup of paint or if there are areas where the paint is falling off, you may need a hard sanding. This takes more time, but it returns the bottom to a new starting point for the paint, which will result in easier bottom jobs in the years to come. Hard sanding takes the paint down to a thin base so we can start fresh with new paint. Hard sanding with and epoxy barrier coat If we have to take the paint all the way to the gelcoat, due to the condition of the paint or other problems with the hull like blisters, we have to remove all of the paint from the bottom. We then follow this with a multiple layer barrier coat of epoxy to seal the gelcoat and protect the fiberglass, which is then painted. A note on blister repair If your boat has blisters, there is a process we go through to grind out the blisters, let them dry out, and then fill and seal the fiberglass to protect the integrity of the hull. Getting your boat back in the waterOnce we've arrived at a plan for the boat, our team gets to work sanding and preparing the bottom to receive the new bottom paint. Here at Snead Island, we take the time to sand the bottom thoroughly, clean the metal, sandblast the sea scoops, and remove and clean bow and stern thruster propellors. It takes time to do a quality job, and we pride ourselves in doing the job well.
Typically we complete bottom jobs in five to seven working days, though it can take longer for larger boats or to address more severe problems like blisters, damage or electrolysis.
|
Snead Island Boat WorksLocated between Sarasota and Tampa Bay on Florida's west coast, Snead Island Boat Works has been serving yacht owners since 1936. Archives
October 2018
Categories |
 RSS Feed
GET IN TOUCH:5225 Snead Island Road Palmetto, FL 34221 Phone: (941) 722-2400 Fax: (941) 722-9650 EMAIL US: [email protected] SOCIAL MEDIA |
ARRIVING BY WATER?GPS:
Latitude: 27.524323 Longitude: -82.620736 
Click map to enlarge. More detailed directions are available on our Contact page.
|